Colour INKspiration – CI161

colink-blogbanner-v3

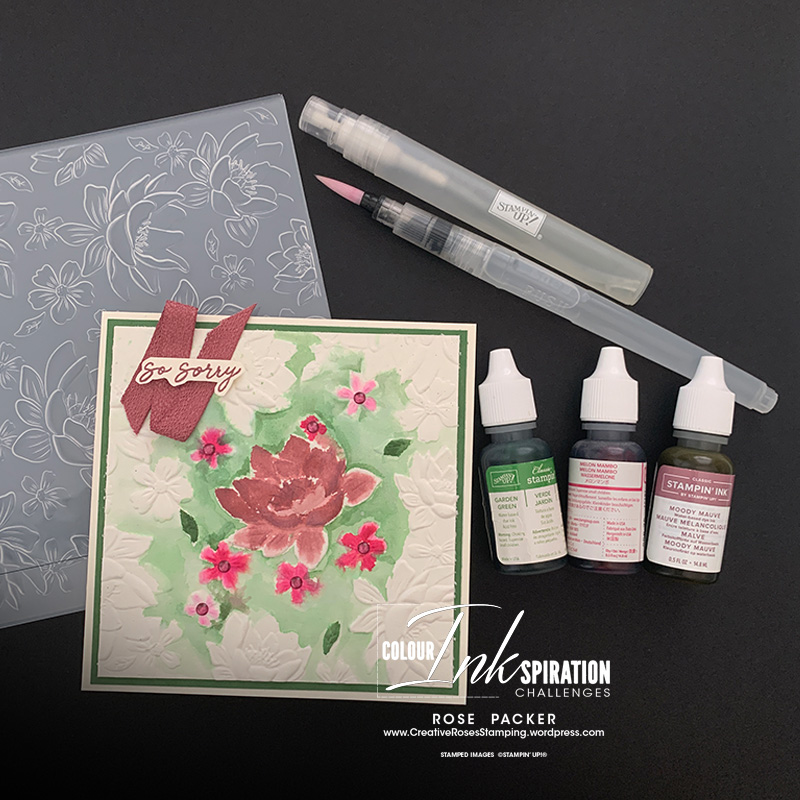
For this latest colour palette for the Colour INKspiriation challenges, I wanted to try something different. The intensity in the colour palette for this challenge suited what I had in mind. So let’s take a look at the colours: Moody Mauve, Melon Mambo and Garden Green.

Rich intense hues allow for gradation of colour to be extracted. So for this card I did some watercolouring. 

Fun Fact: Although I am a Graphic Designer, my drawing skills are not great – so much so, I didn’t score well in my Life Drawing classes back in my Uni days! Graphics and Illustrations are two different disciplines!

Rather than stamping, I created a base design to watercolour by using the Layered Florals embossing folder and some Fluid 100 paper. The 3D style of this embossing folder really lends itself to this technique as it is so deeply etched. 

Dotting some ink from my reinker and mixing a little water to dilute it, I used water painters and spritzers to add my colour. The richness of these colours means you can extend the colours to create light and shade. 

I purposefully embossing a section of the folder, so that there was a centre flower, to help create my little piece of Monet.

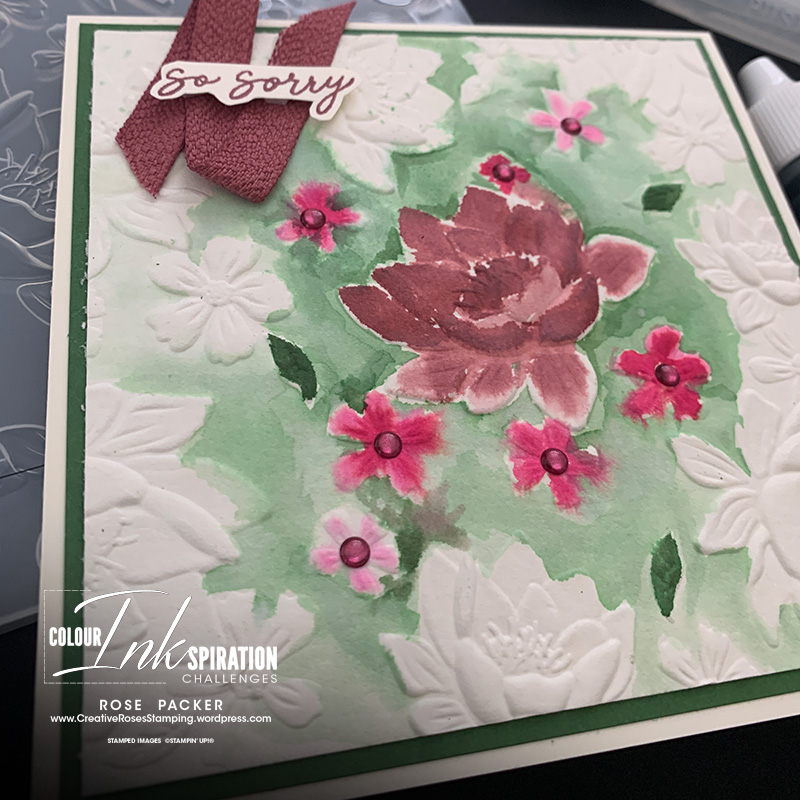
I will continue to practise my blending skills, but it was fun to colour in a different way and produce a little piece of art in a different style to my norm.

ColINK-badge-v3

More INKspiration is loaded up over in our Facebook Challenge group. Head over and enjoyed all the amazing inspiration from the crew. We will be excited to have you play along with us. This challenge is open until Monday March 25th. Look forward to seeing you over on the group..

Until next time… Stamp Creatively,
RosePacker-SignOff

Click to shop supplies specific to this project:

Stampin’ Staples – Click to shop these commonly used crafting supplies:

Stampin' Seal
$14.00
Paper Trimmer
$46.00
Bone Folder
$12.25
Paper Snips
$19.25
Clear Block B
$12.25
Clear Block D
$16.75
Clear Block E
$23.00
Clear Block H
$16.75

Blossoms in Bloom bundle

I’m so in love with the Blossoms in Bloom bundle and it’s over-size features. When stamps and dies are big like these, they can be over-whelming and leave you feeling a little like, you’re not sure what to do with them.

First, let’s take a look at the bundle:

The dies in this set are pretty easy to work, right? Layering both big flower dies together using different coloured card stock and you can get amazing results. You don’t need to do to much else, keep it simple and let them shine on a card. Or you may want to chop them in half, add some designer paper and some ribbon and make two cards with both halves.

They are just a couple of quick idea. But what about the stamps, hmm… easy right…. Stamp the big flower bouquet on some card stock and layer the dies over the top for a triple layer number. Then what?

That’s what I thought too – so in here I wanted to focus on the stamps and give you some inspiration on what else you can do with them.

The stamps themselves are just fantastic, they are distinctive in style and feature that large stamp of blooms, plus a few more single blooms to use as features, and some leaves, making it really easy to create a big background for a scrapbook page or home décor piece. Plus those sentiments are winner aren’t they? Simple, traditional and cover most occasions you would create for.

Here is a card I made with the large bouquet stamp… I kept it simple and added a splash of colour to create some depth.

Rose Packer, Creative Roses, Stampin' Up!, Blossoms in Bloom

I inked it up with Daffodil Delight and stamped it on some Whisper White card stock. I could have just left it at that and finished my card, the stamps themselves are just beautiful and you see the distINKtive style at work instantly.

Instead, I decided to step it up a little with some colour – using my Pumpkin Pie water colour pencil and Blender Pen, I added some colour and blended the two colours to add some depth. It’s such a simple technique but so effective at giving your image a little extra lift. Here take a look at both of these together: on the left is just the stamped image, you can see the card on the right with the added boost of colour.

RosePacker20_33c

Amazing isn’t it?

I finished off my image with some stamens, stamped in Pumpkin pie ink, I added some colour pencil and blended it in too. Then used my Pumpkin Pie dark Stampin’ Blends to colour in good ol’ Rhinestone jewels to match. Every card needs some bling doesn’t it?

Rose Packer, Creative Roses, Stampin' Up!, Blossoms in Bloom

I punched out my blooms using a rectangle stitched die and layered it over one of the Ornate frame dies in Pumpkin cardstock. I used Basic Black for the card base allowing my blooms to be the highlight, and created a simple sentiment – white embossing powder on black cardstock.

I can’t wait to share with you another idea I have for these stamps… that is coming soon, so stay tuned.

Until next time… Stamp Creatively,
RosePacker-SignOff

Click to shop these supplies:

Water colour swirls

So here I am back with more swirly circles from the Swirly Scribbles thinlit die set. Yep, you guessed it… it’s my new fav.

CYCI124-232x300

Over at Can You Case It? [CYCI#124] challenges this week,
was this Water colour sketch challenge.


RosePacker16-31

I did my water colouring and added in my sentiment, but I just couldn’t resist adding a little swirly circle or two. What do you think?

Until next time… Stamp Creatively,
Rose.

What I used to make this: