You Can Create It – December pack ideas

Welcome to the last pack of the year for You Can Create It. It’s been a fun year of challenges using the select group of products. This post is ideas using the December pack of products, which featured the Tartan Foil Specialty paper.

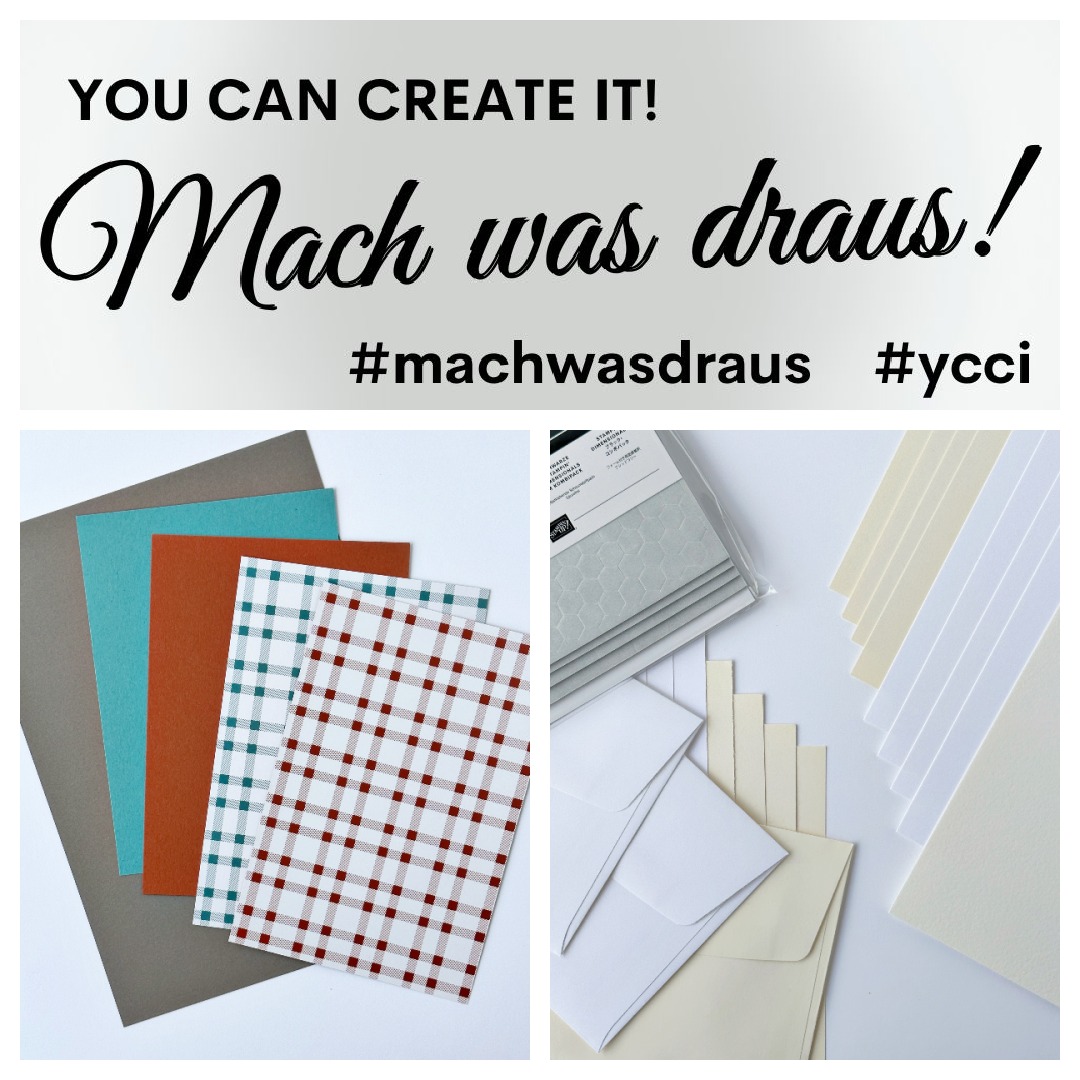
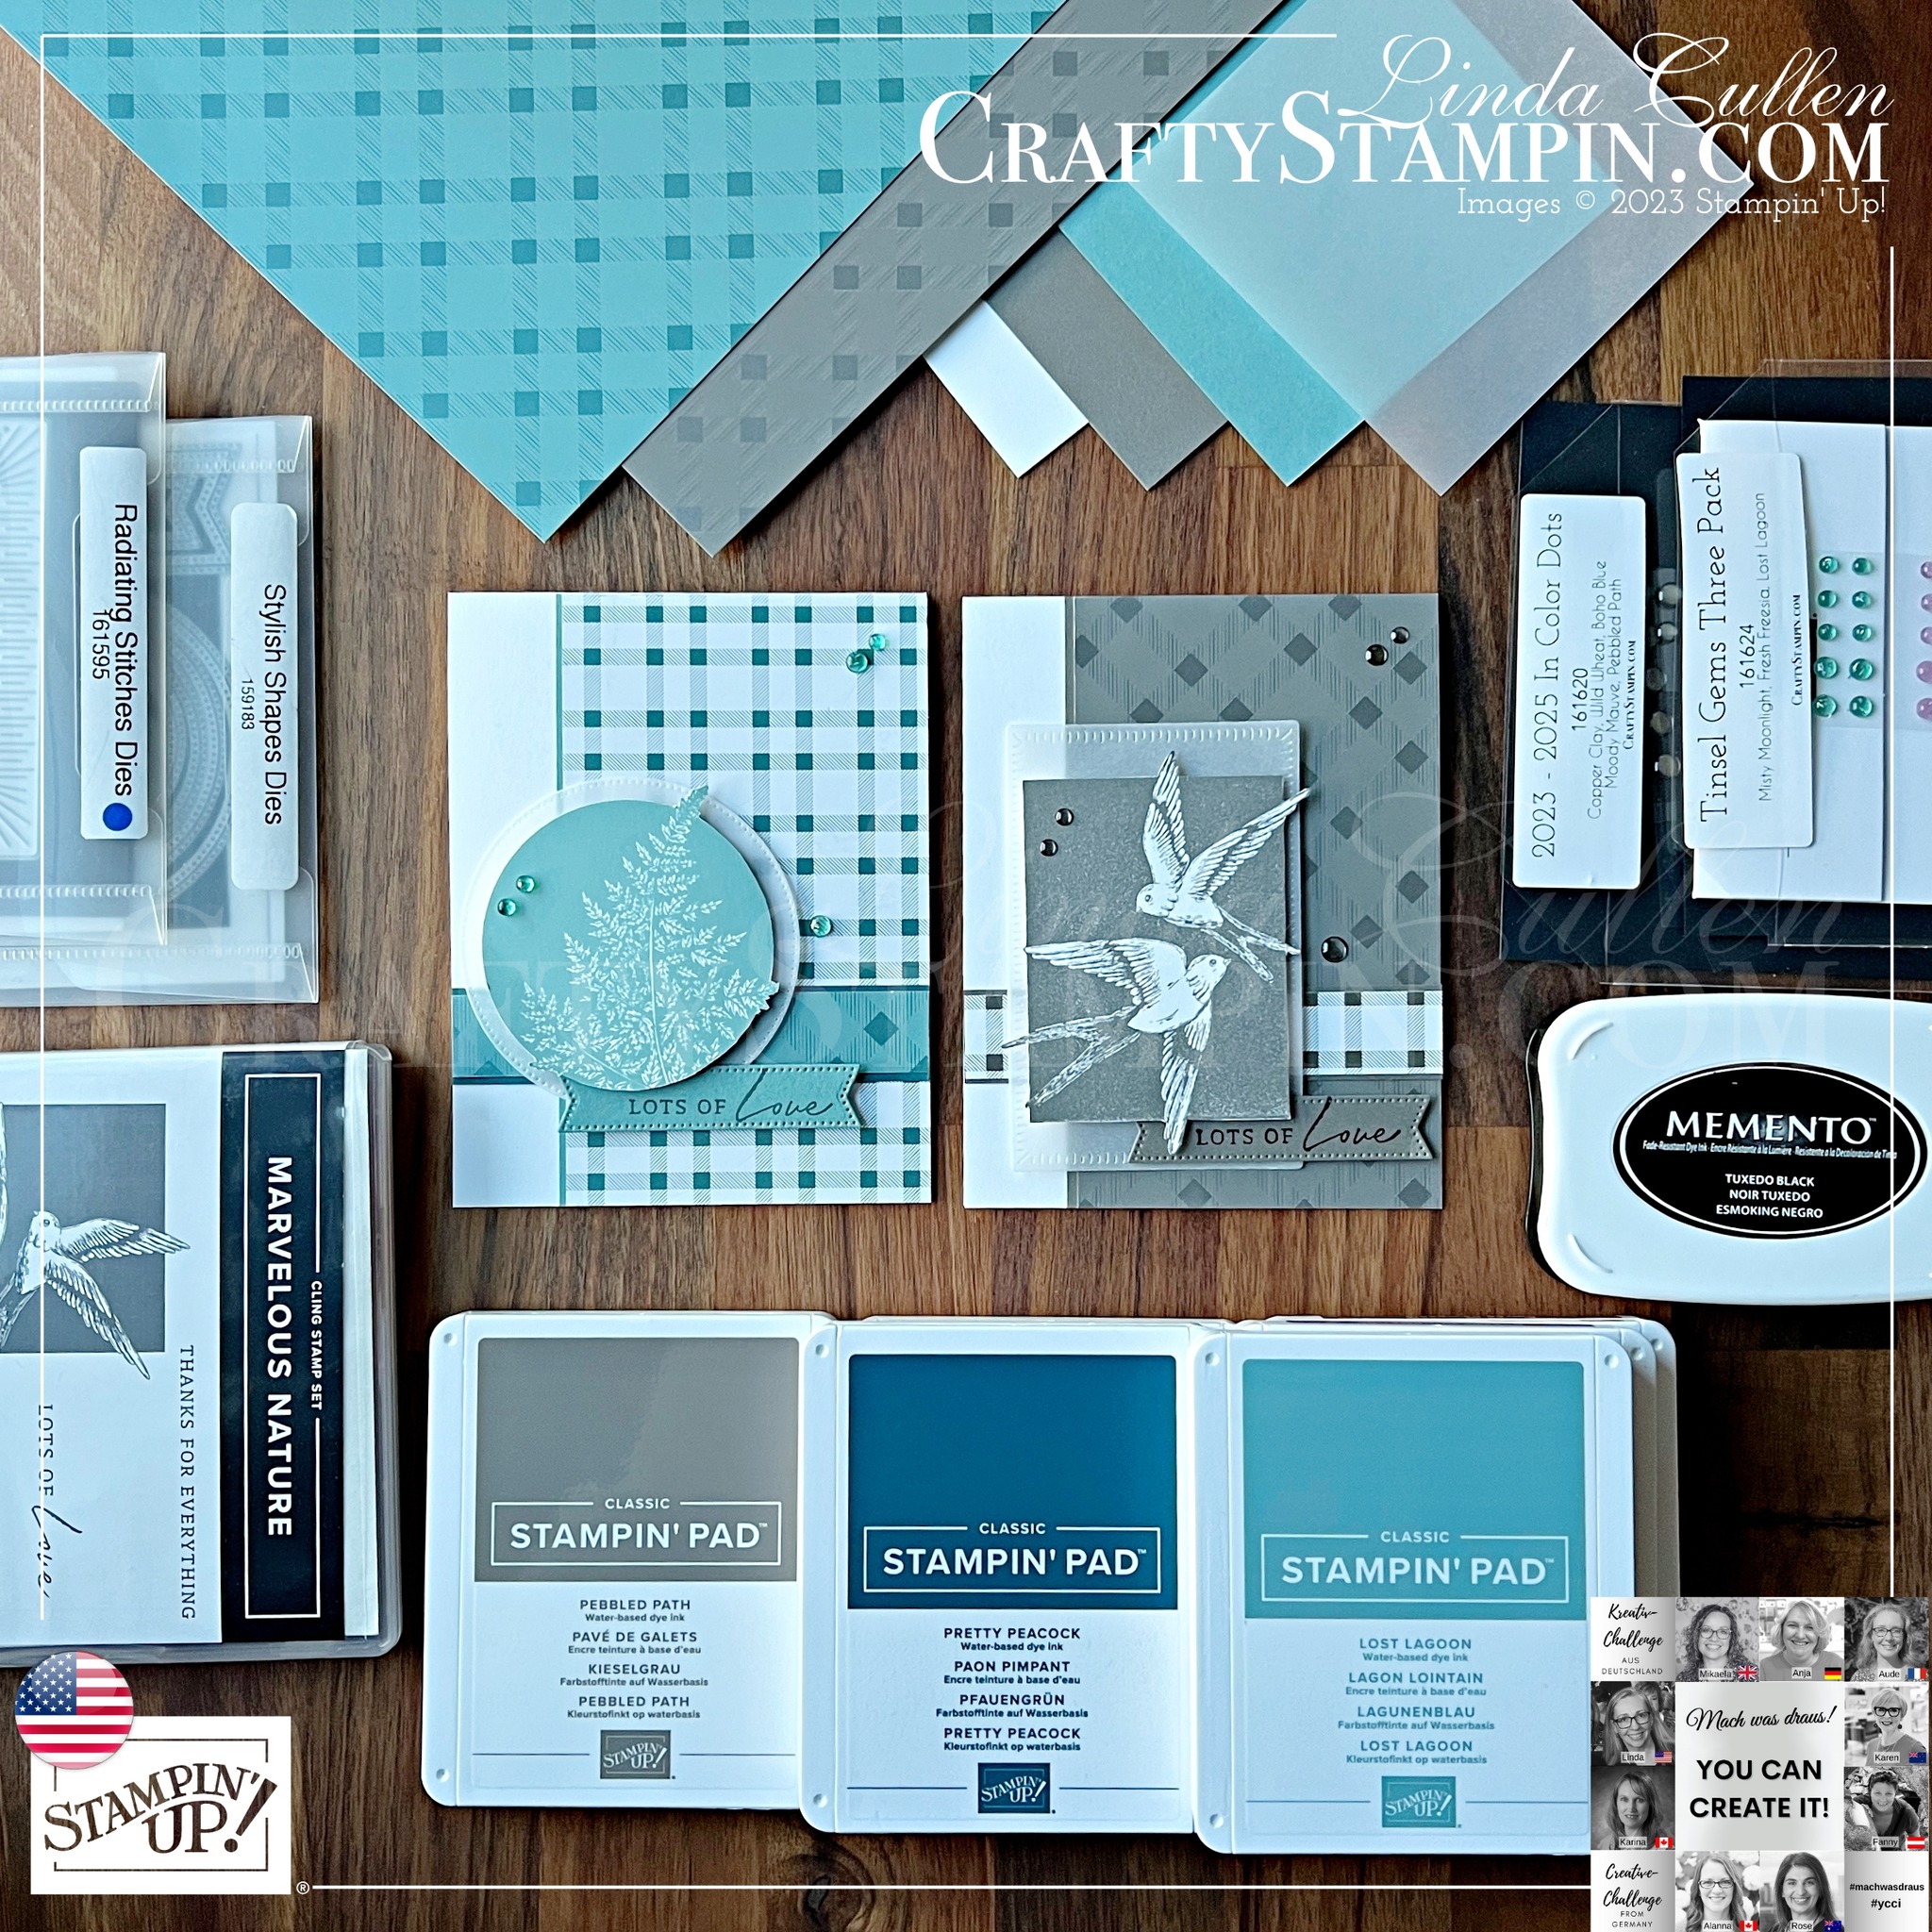
There was so much product in that pack, it was hard to decide what to do as I had so many ideas! Let’s take a look at what was included in the pack…. On the left we have Specialty paper and coordinating cardstock for the month. Plus, on the right, is the extra materials supply pack with can be used across all four monthly packs in the kit.

Here are the two ideas I settled on in the end. I went with a landscape and a portrait card.

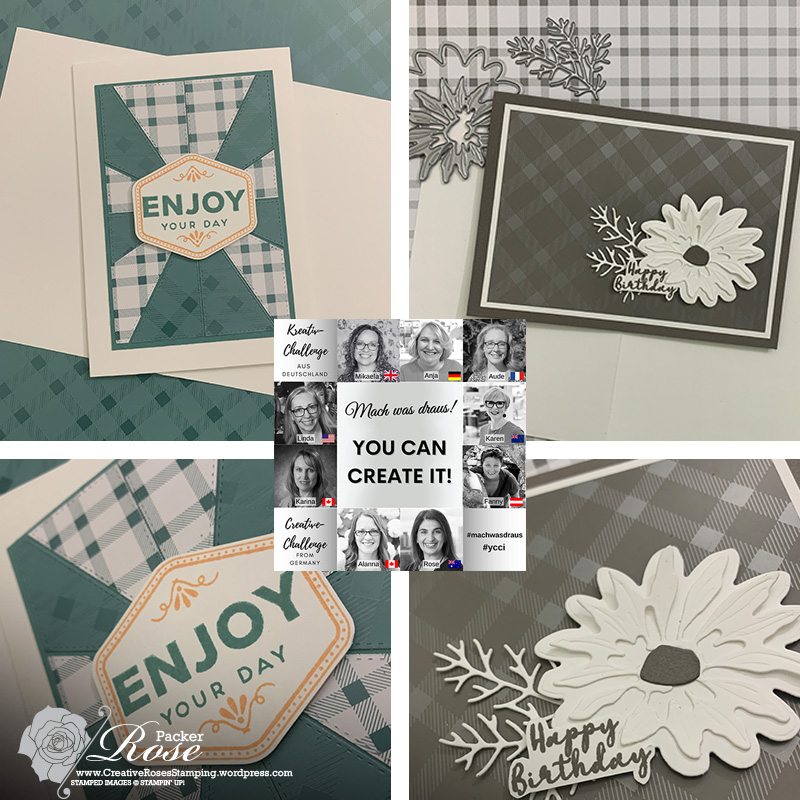
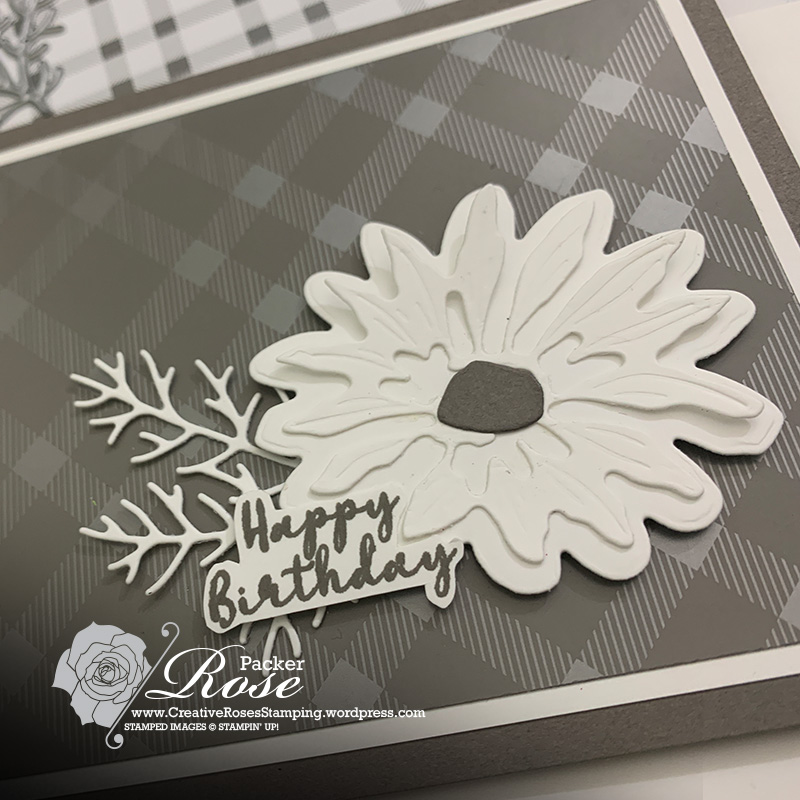
This first idea, a landscape card, is nice and simple… simple layering of cardstock and the tartan foil and topped off with a cluster arrangement of White flower and leaves. 

Rose Packer, Stampin' Up!, You Can Create It kits, Tartan Foil Specialty paper

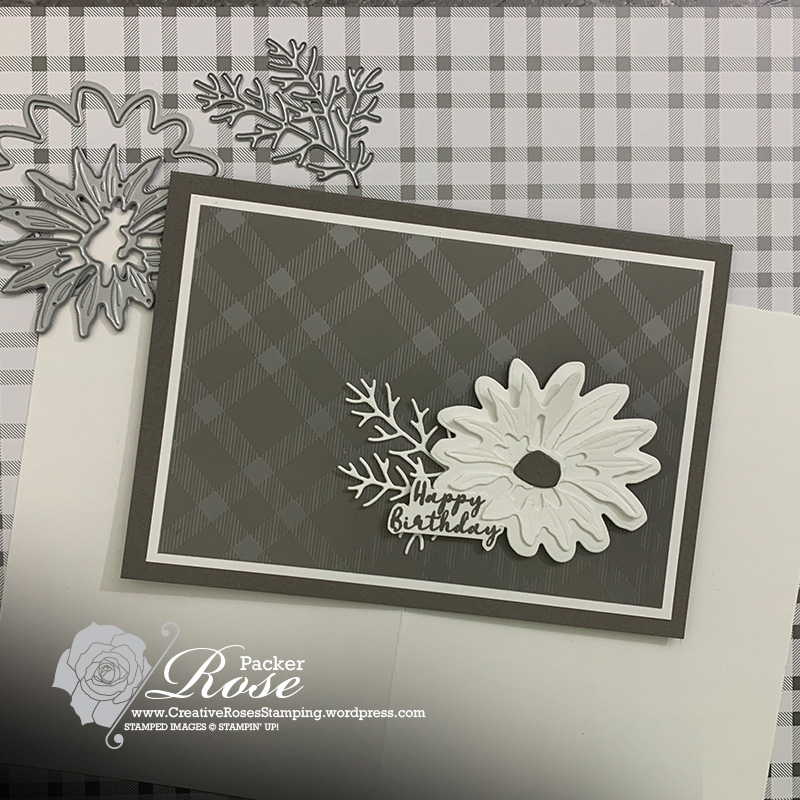
If I wanted to step this up a little, here are two simple ideas: 1- add some jewels or gems for extra bling, or 2- add another colour – say Wild Wheat as the stamen to the flower and match in some Wheat thread around the layers, stamp the sentiment in the same colour and perhaps some gems.

Rose Packer, Stampin' Up!, You Can Create It kits, Tartan Foil Specialty paper

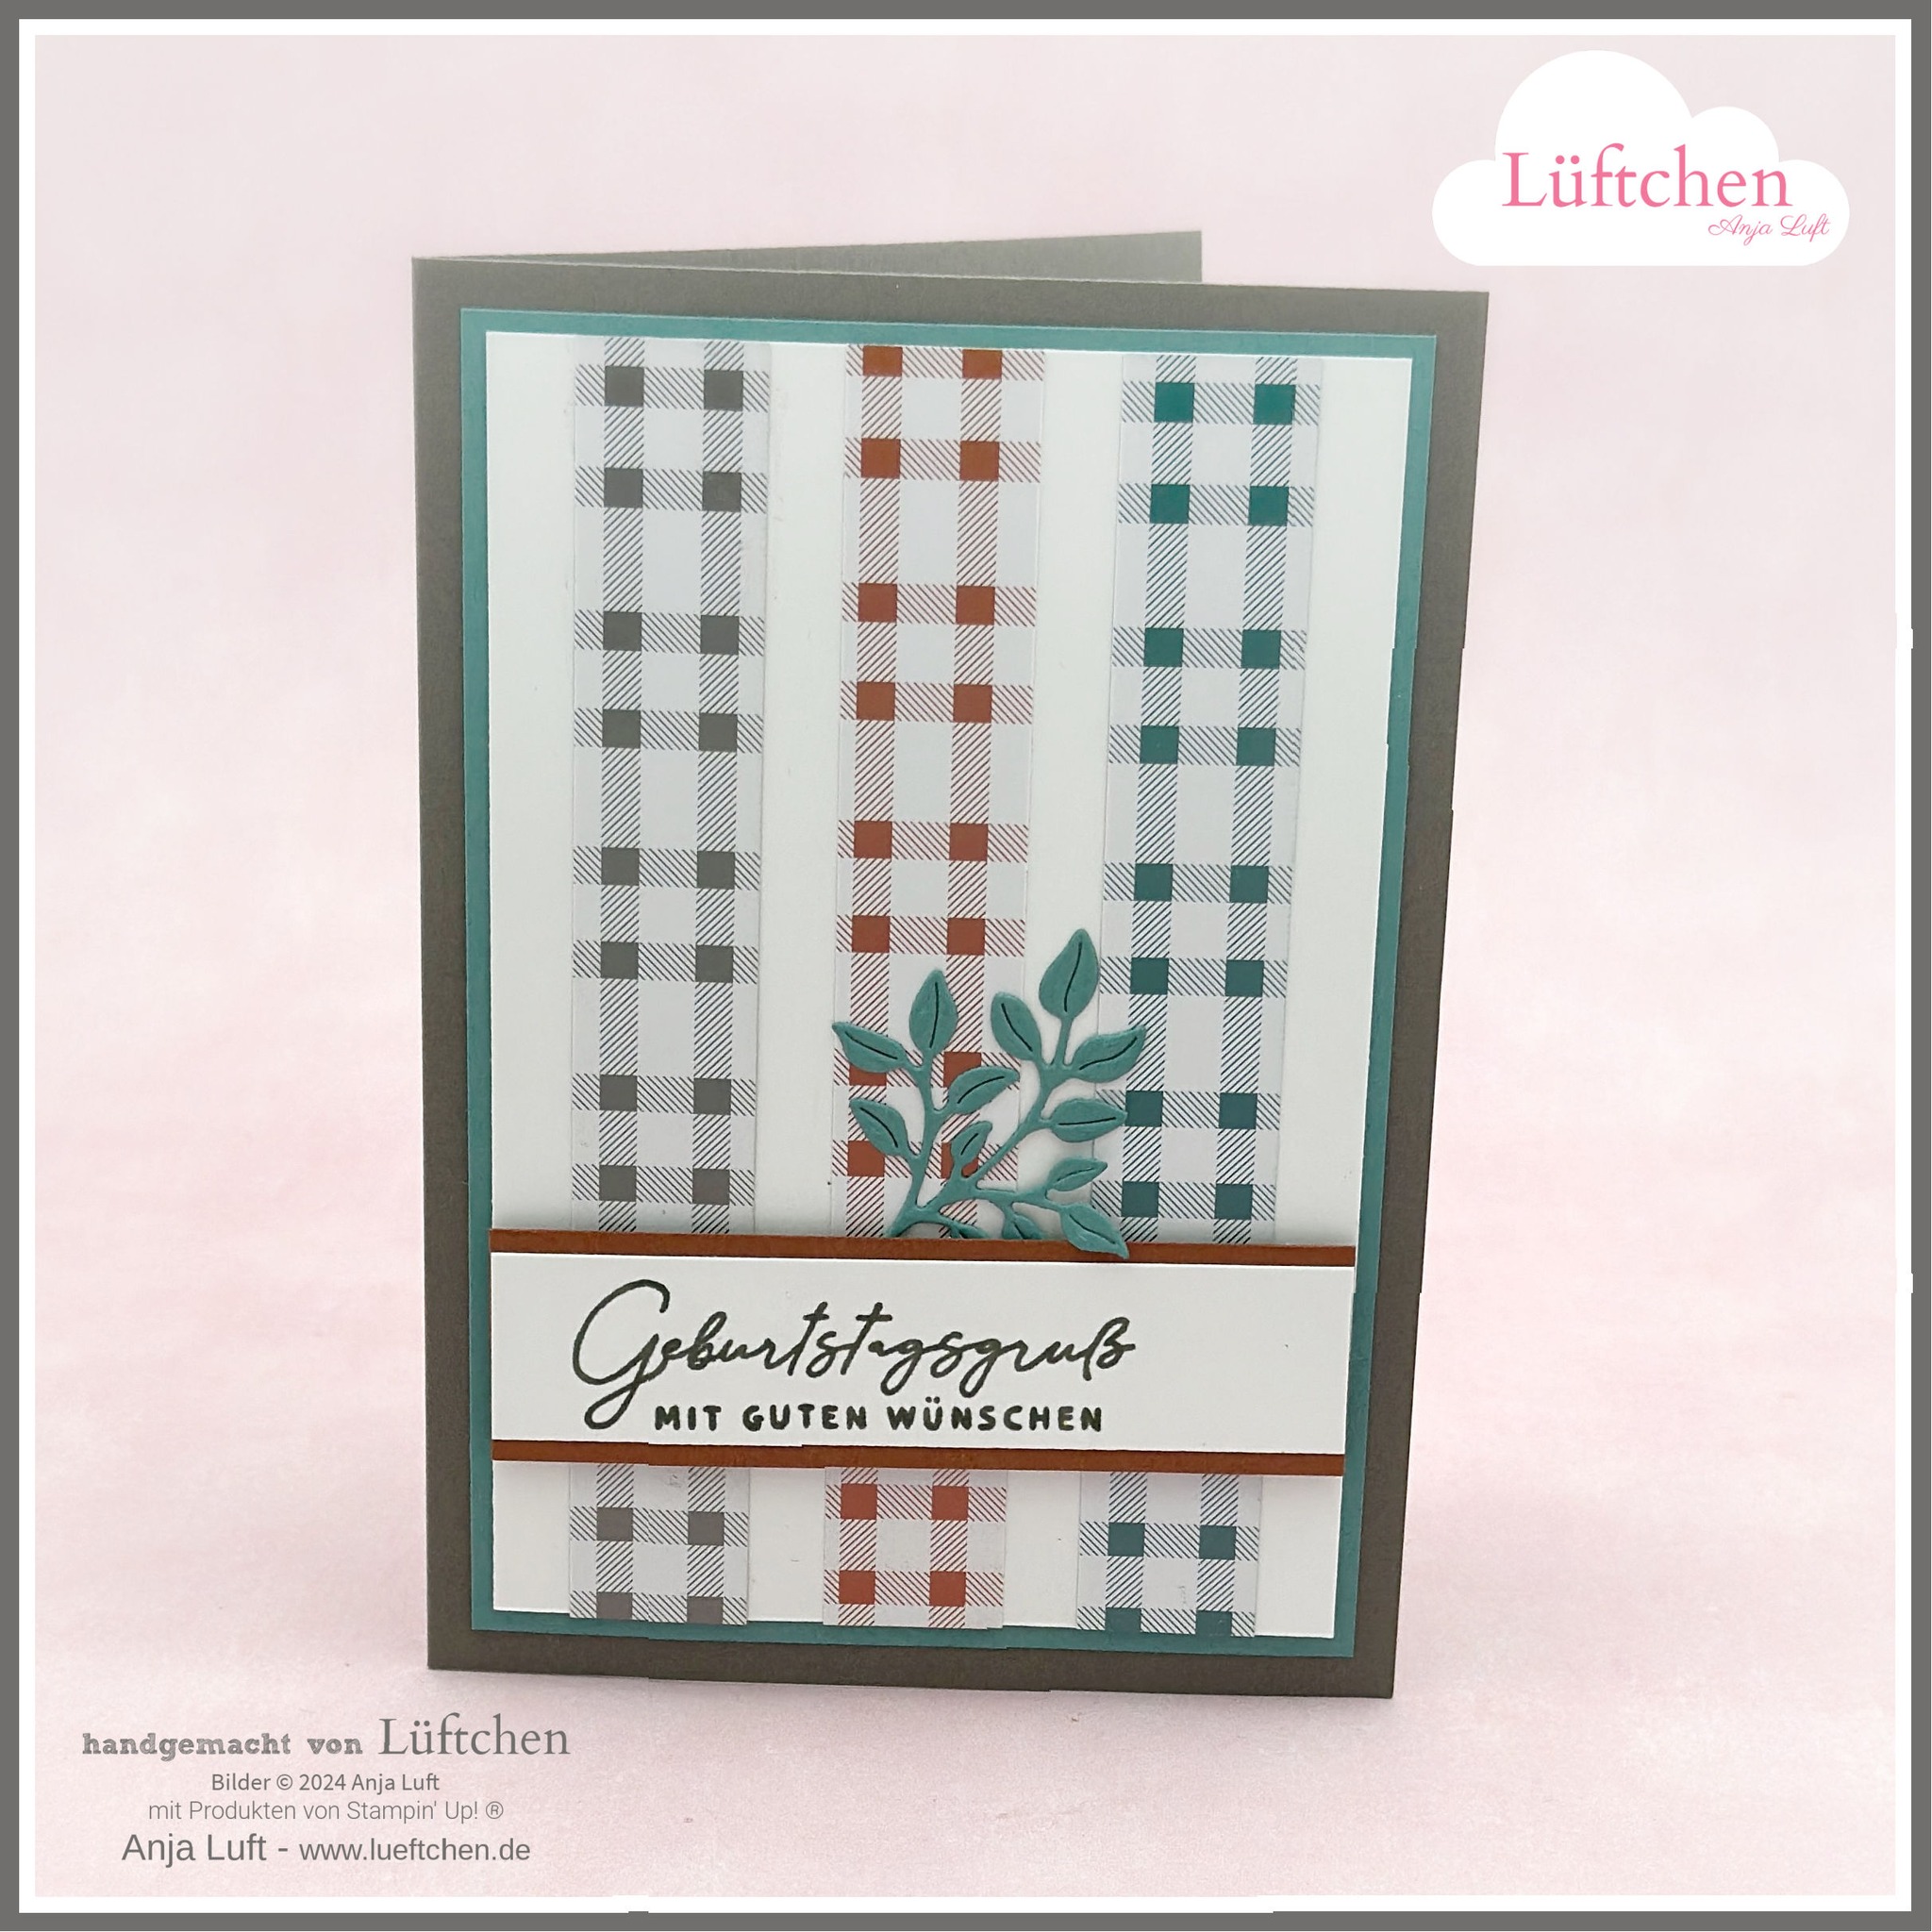
This second idea is another card in portrait. Here I have used the patchwork pieces dies to create some interest.

Rose Packer, Stampin' Up!, You Can Create It kits, Tartan Foil Specialty paper

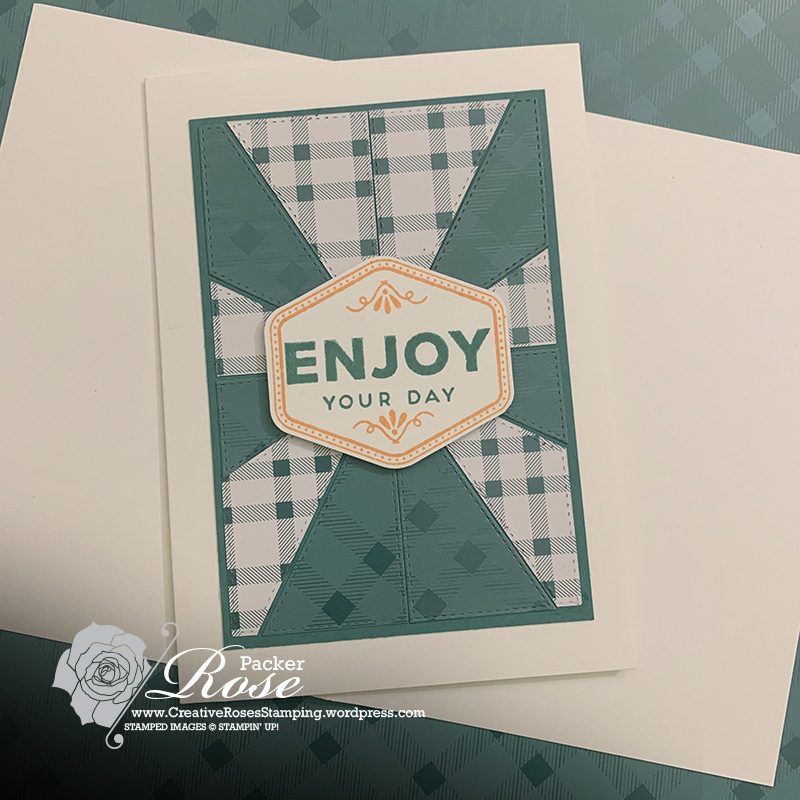
I flipped over and rotated some of the pieces to use both sides of the amazing speciality paper. I topped it with a simple sentiment and added some bright colour, contrasting ink.


I will be back for another year with You Can Create It and offering these kits during 2024. If you wish to know more about them, how they work and how you can craft with them, read more here. My subscribers will be invited to my VIP Facebook group where I will feature more ideas and lives/videos about these products throughout the year. Subscriptions for the first kit are now open and will ship at the end of the month.

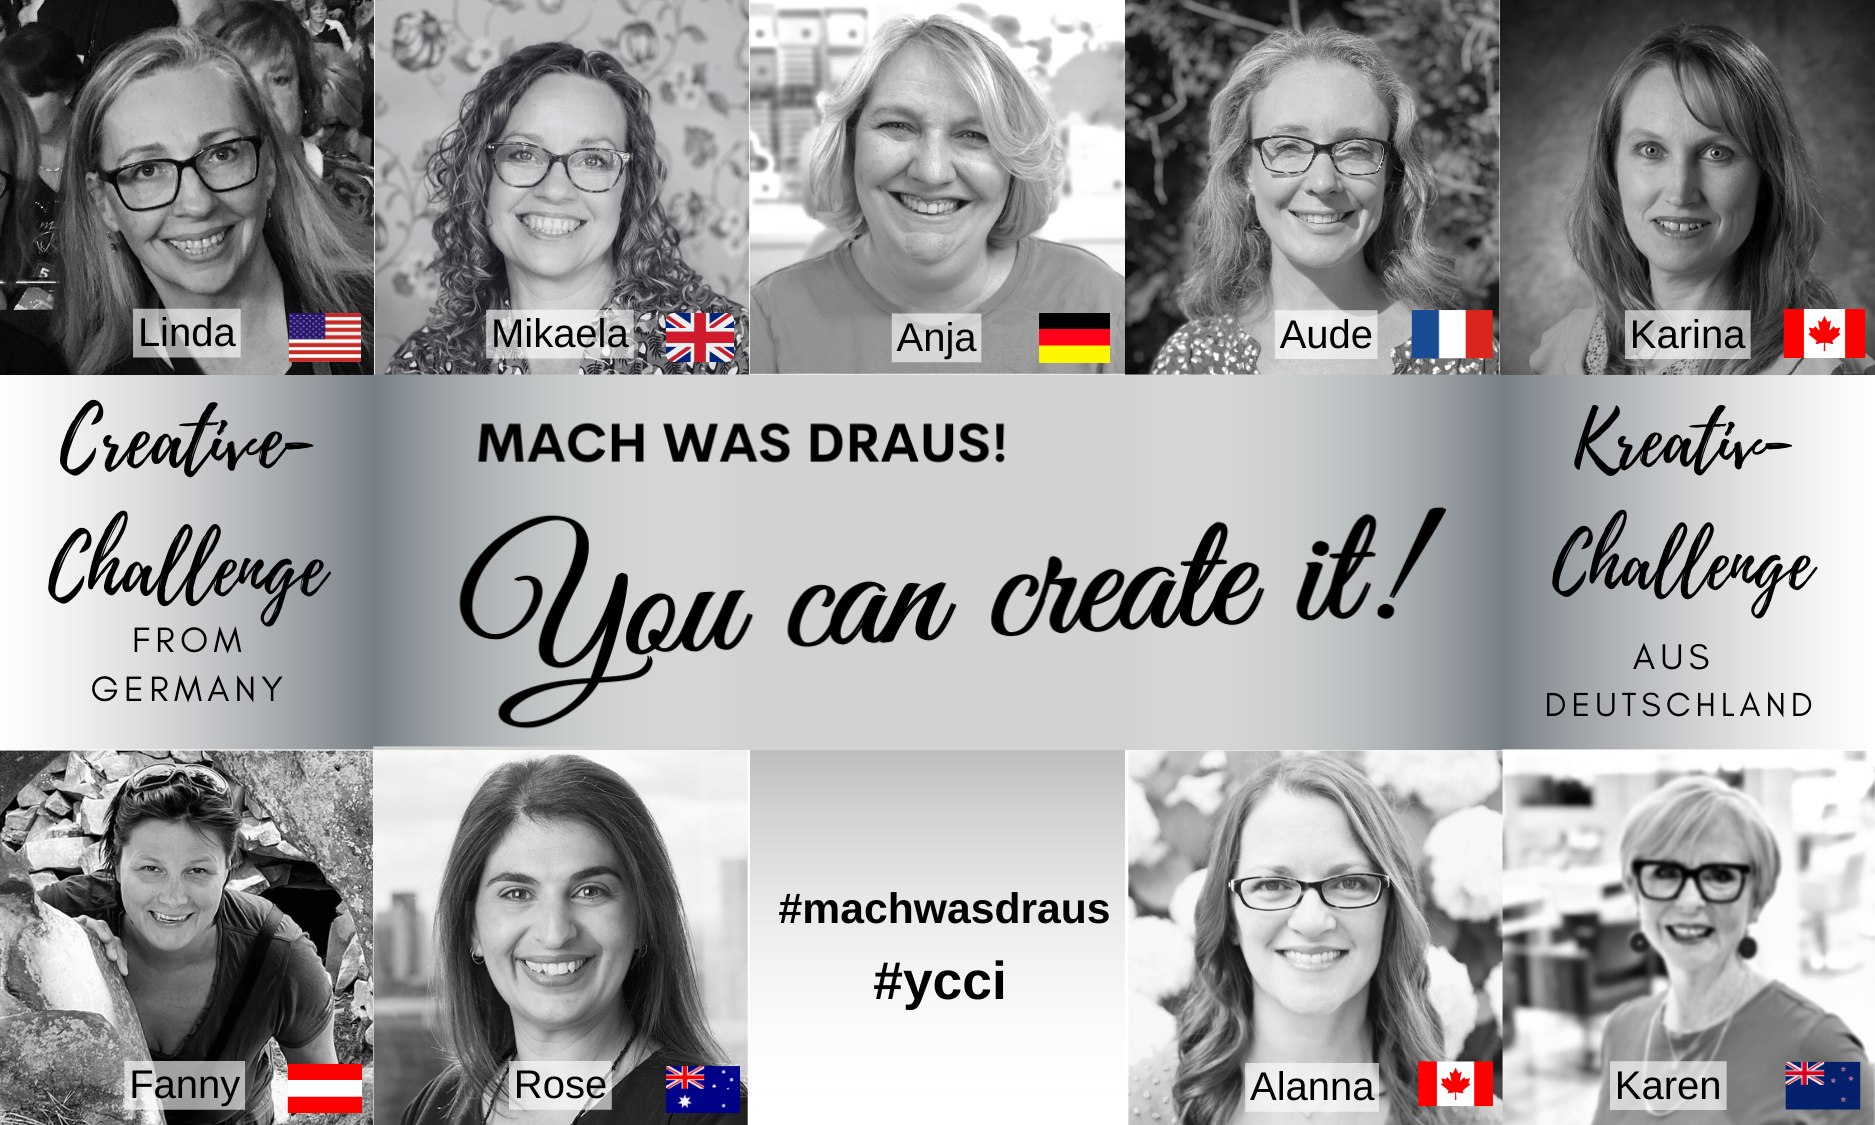
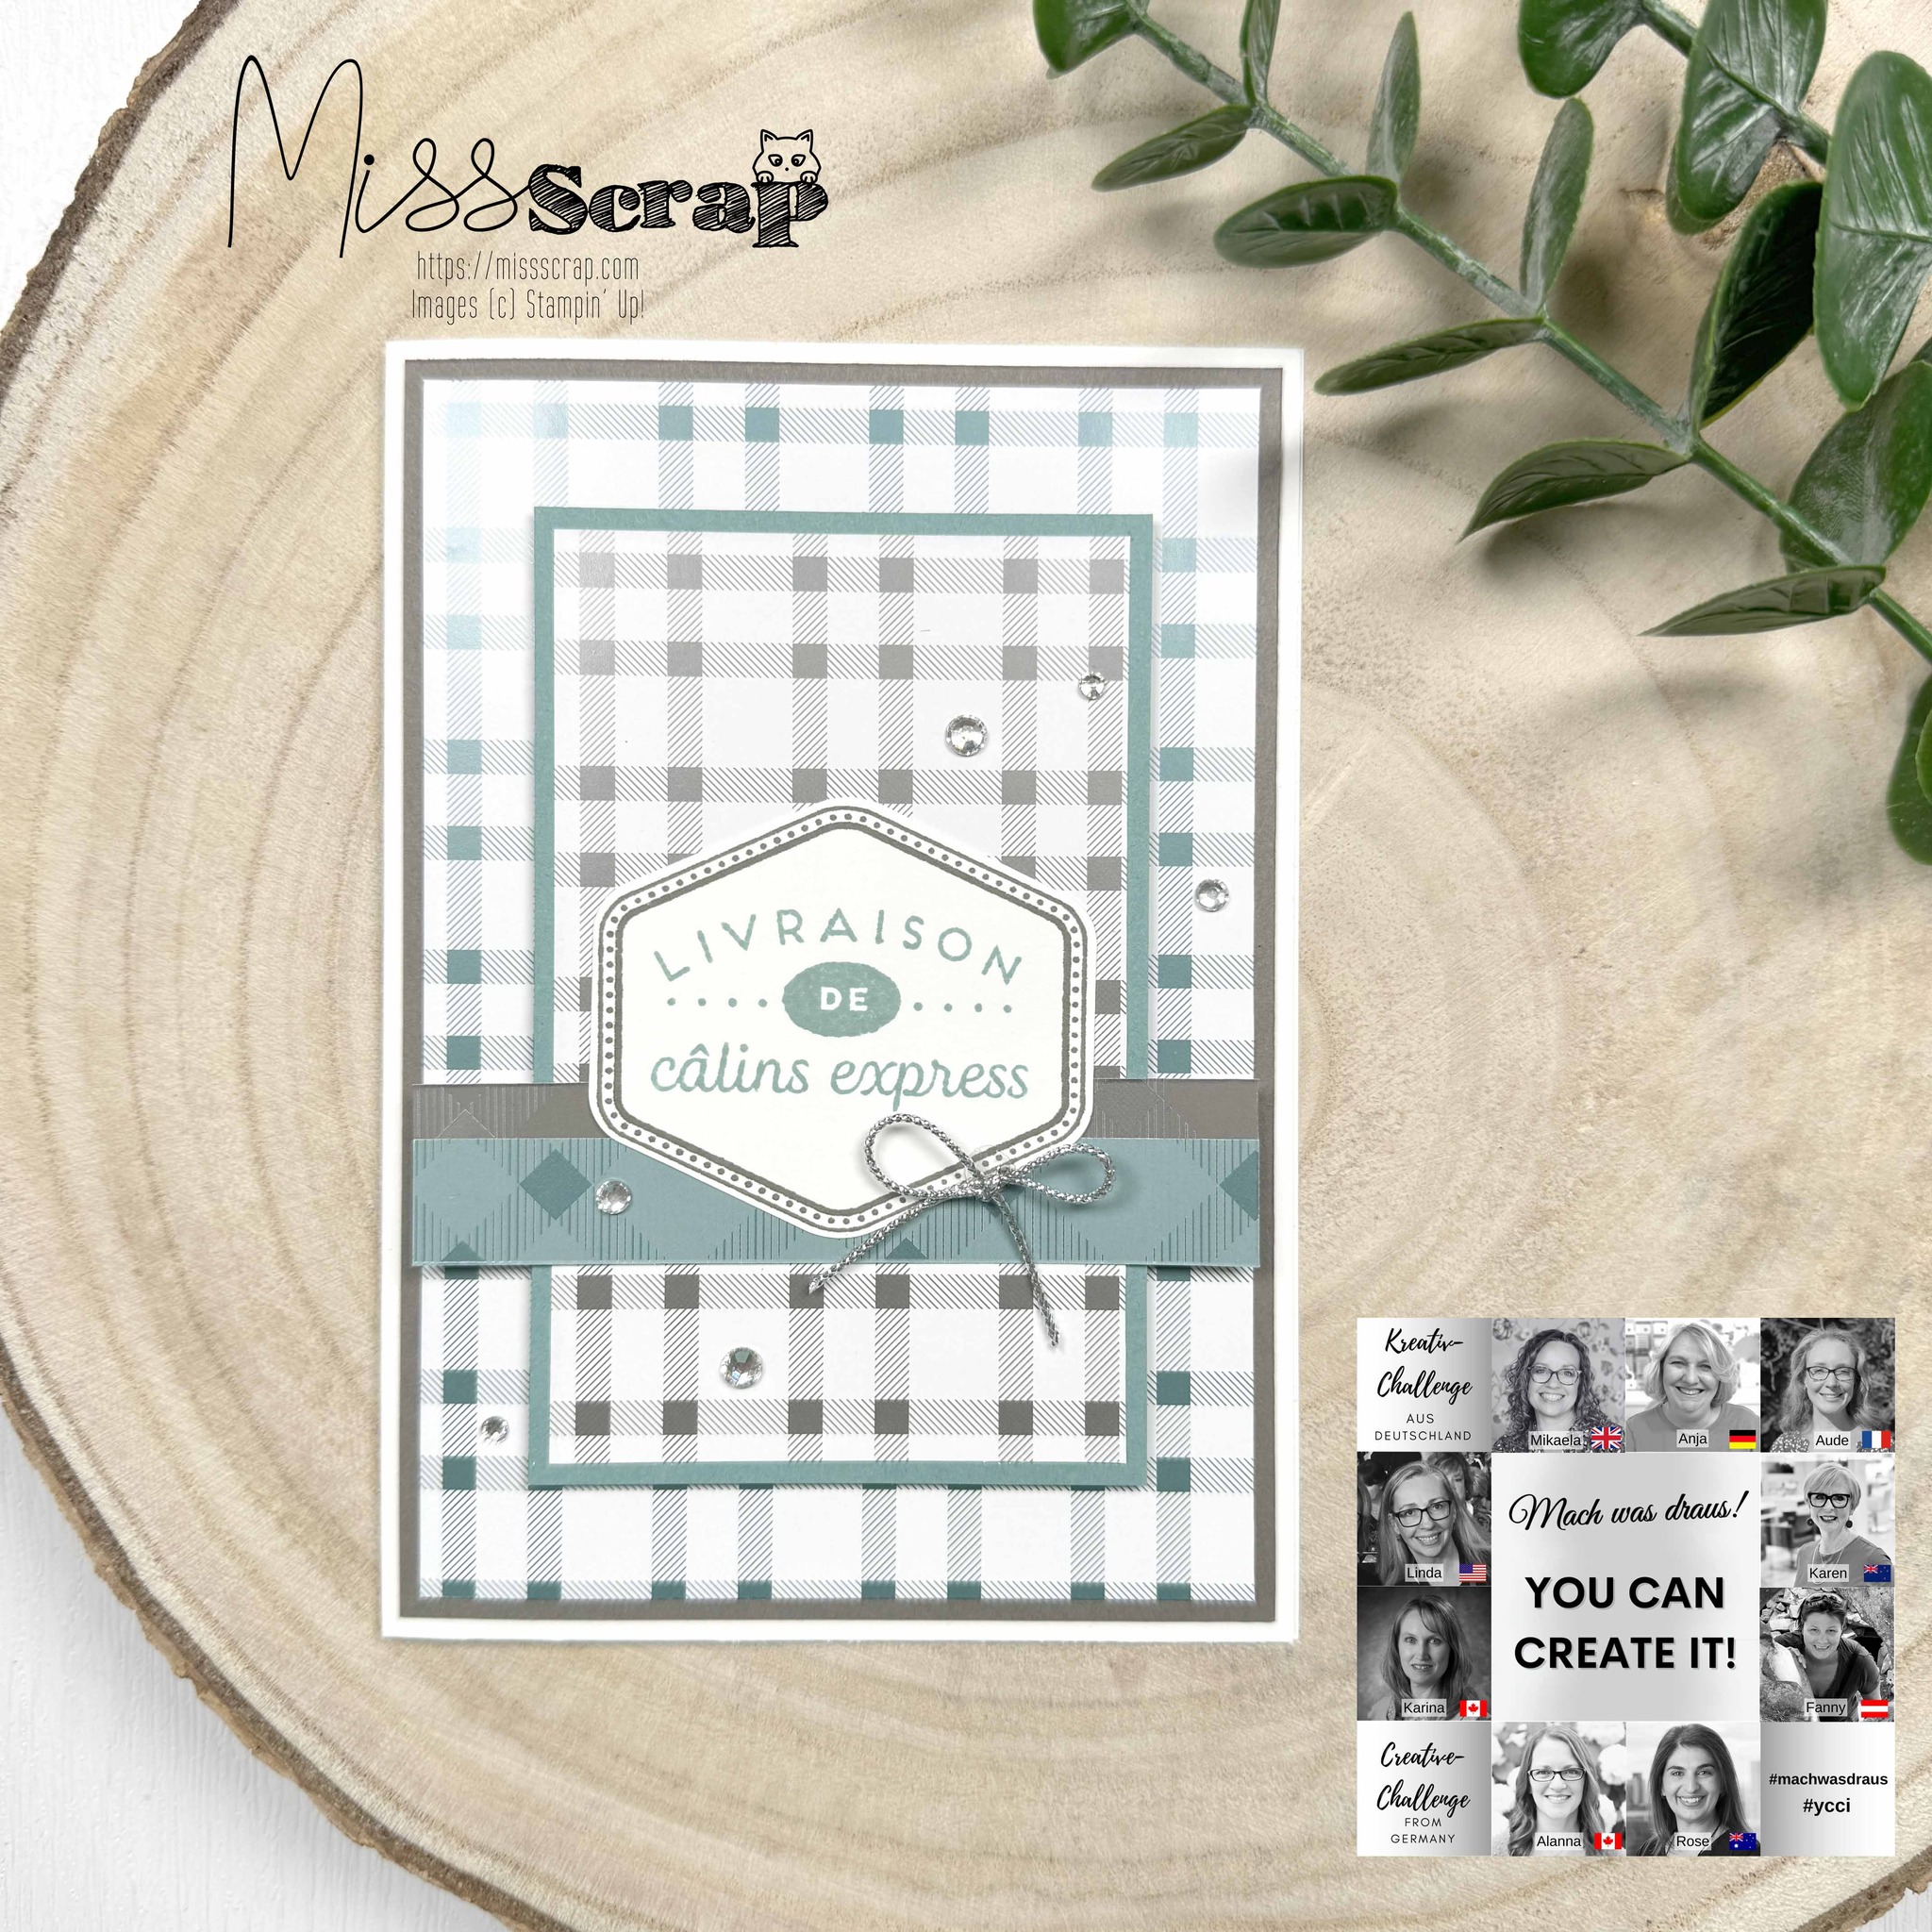
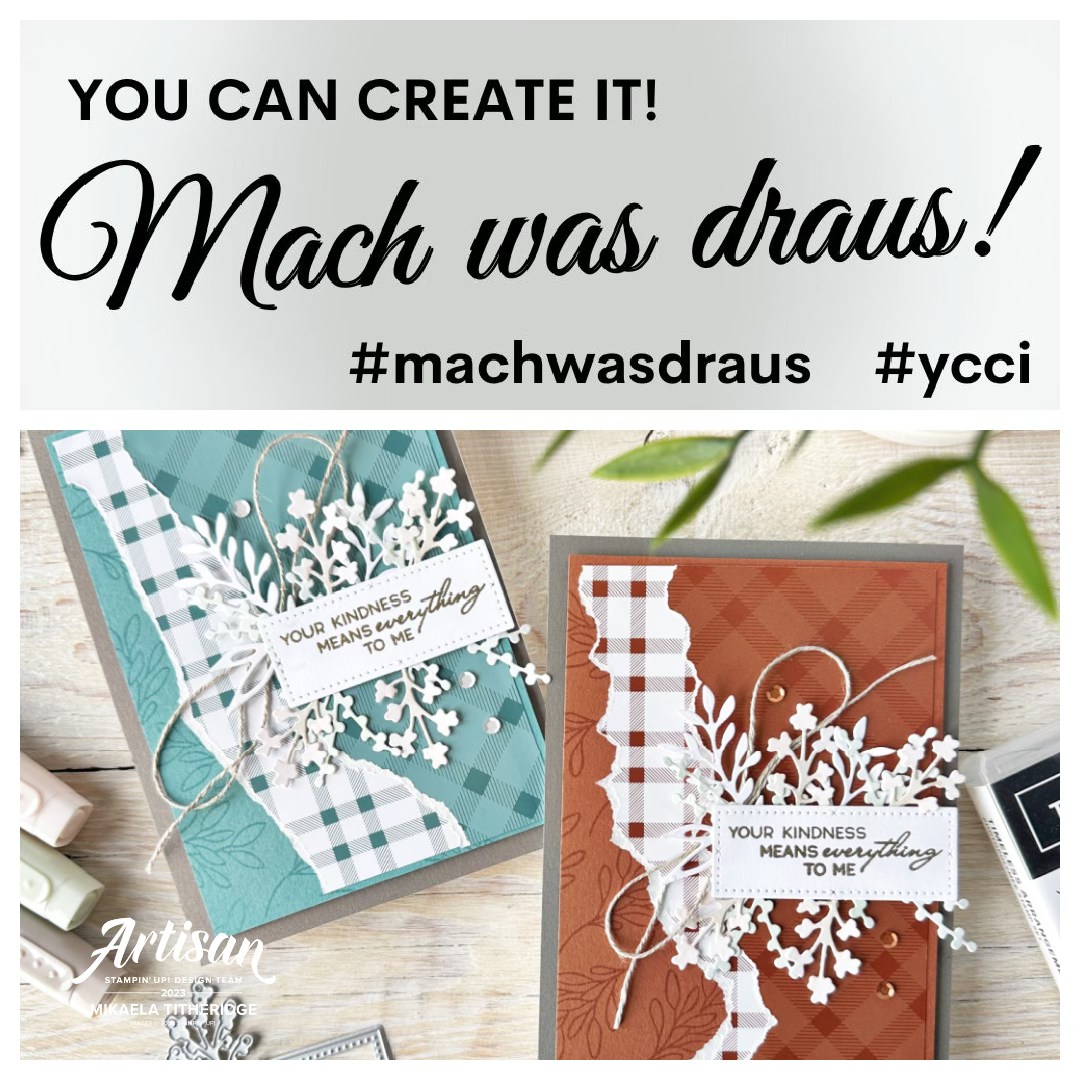
Here are December pack ideas from our Global Demonstrators for this months kit:

Aude Barbara

Linda Cullen

Anja Luft

Mikaela Titheridge

Until next time… Stamp Creatively,

Click to shop supplies used in this project:

Stampin’ Staples – Click to shop these commonly used crafting supplies:

Stampin' Seal
$14.00
Paper Trimmer
$46.00
Bone Folder
$12.25
Paper Snips
$19.25
Clear Block B
$12.25
Clear Block D
$16.75
Clear Block E
$23.00
Clear Block H
$16.75

Colour INKspiration – CI157

colink-blogbanner-v3

What a bright and cheerful colour palette we have this challenge at Colour INKspiration #CI157. This being our last challenge for the year too! Let’s take a look…

We have Bubble Bath, Flirty Flamingo, Lemon Lime Twist, Coastal Cabana and Orchid Oasis. Plus of course we can use Black, White, Crumb Cake and metallics.

Whilst the inspo image is Christmas themed, these colours reminded me of summertime ahead. A fun part of summer days is ice-cream…. I mean, come on who doesn’t love an ice cream?! So I pulled out a very brand new bundle coming next January. It’s the Ice Cream Swirl bundle and the feature is the very large size ice cream scoop – OMG I so want one to eat just looking at it.

Rose Packer, Stampin' Up!, Ice Cream Swirl bundle

To make this card I cut a card base from Orchid Oasis cardtock and embossed the front with the Cane Weave embossing folder. Next I layered a strip of Flirty Flamingo cardstock – I cut to the width of the cardbase so for me that 105mm, the height really can vary to your liking – mine is 30mm.

I die cut and embossed the cone at the same time from Crumb Cake cardstock. The die set features these two dies that work together, which is such a time saver. I cut the paper holder from Coastal Cabana cardstock, and adhere it over the top. I stamped the sentiment in Orchid Oasis ink and fussy cut it out. I set these aside while making my ice cream.

Rose Packer, Stampin' Up!, Ice Cream Swirl bundle

I stamped the swirl in Bubble Bath ink, then coloured my flavours using Stampin’ Blends in Bubble Bath, Flirty Flamingo and Lemon Lime Twist. After colouring, I die cut it out, adhered it to the cone and used dimensionals to adhere in place on my cardfront. I finished off the card with a few Iridescent Rhinestones.

Don’t you just want to eat one now?! I can’t wait to place some more with this bundle in the coming months.

ColINK-badge-v3

More INKspiration is loaded up over in our Facebook Challenge group. Head over and enjoyed all the amazing inspiration from the crew. We will be excited to have you play along with us. This challenge runs for 4 weeks over Christmas. It closes at 7pm on Monday, January 8th. Look forward to seeing you over on the group..

Until next time… Stamp Creatively,
RosePacker-SignOff

Click to shop supplies specific to this project:

Stampin’ Staples – Click to shop these commonly used crafting supplies:

Stampin' Seal
$14.00
Paper Trimmer
$46.00
Bone Folder
$12.25
Paper Snips
$19.25
Clear Block B
$12.25
Clear Block D
$16.75
Clear Block E
$23.00
Clear Block H
$16.75

Colour INKspiration – CI156

colink-blogbanner-v3

I’m a traditional girl at heart when it comes to Christmas and this next colour palette for Colour INKspiration is just that. It’s so my cup of coffee!

Here we are playing with Black and White along with Real Red and Shaded Spruce.

I went back to my comfort zone with a traditional Christmas card. 

Layering black cardstock onto a white card base created the start for the decorative layers. I stamped fir leaves in Shaded Spruce ink onto a layer of White cardstock. Whilst this colour green ink is not my go to, what I do like about it is… it’s such a rich colour it’s perfect for generational stamping technique. This is what I did here in the background, stamping off first and creating light and dark leaves, thus stitching the shades of colour within the one ink pad. I added two die cut fir leaves. The fir stamp is from the Christmas classics bundle and the die is from the Joy of Noel bundle.

Next I layered some Black and White gingham ribbon and a strand of silver trim. Over the top is the main feature – the sentiment. Here I white heat embossed the letters from the Alphabest stamp set and punched them out with the coordinating punch to create the Merry. I stamped the Christmas for the Joy of Noel stamp set in Black ink and fussy cut.

To finish I scattered some silver pearls from the Festive Pearl pack. I hope this has inspired your creativity to create your version of these.

ColINK-badge-v3

More INKspiration is loaded up over in our Facebook Challenge group. Head over and enjoyed all the amazing inspiration from the crew. We will be excited to have you play along with us. This challenge is open until Monday December 11th – that’s almost three weeks. Look forward to seeing you over on the group..

Until next time… Stamp Creatively,
RosePacker-SignOff

Click to shop supplies specific to this project:

Versamark Pad
$16.75
Heat Tool
$54.00

Stampin’ Staples – Click to shop these commonly used crafting supplies:

Stampin' Seal
$14.00
Paper Trimmer
$46.00
Bone Folder
$12.25
Paper Snips
$19.25
Clear Block B
$12.25
Clear Block D
$16.75
Clear Block E
$23.00
Clear Block H
$16.75

Stars of Night – Faux Centre Step Card

The Faux Centre Step fun card fold is making the rounds and it’s easy to see why – not only are they fun to make, but they looks fabulous and are very economical to make with little wastage of cardstock.

Today I’m using the Star at Night hybrid bundle, from the O Holy Night suite in the September Mini Catalogue. Without further ado… here it is…

Here I have decorated the centre step with some of that lovely Designer Paper and Silver Adhesive Backed Glimmer – nice and simple decorating. The base card features more Designer Paper and Luster Paper to decorate the front face and Basic White for the message on the inside.

I recorded a video tutorial for this card and the link for that is below. Also below is a material list I have used to create this card design.

To help you create one of these I have listed the measurements here that I use and talk about in the video:

Base card

Night of Navy A4 cardstock, cut in half to 210mm x 148mm. At one end score at 25mm (1”) and 50mm (2”).

From the opposite end score at 80mm. (Or said another way: from left to right, score at 80mm, 160mm and 85mm).

Decorate the base, you will need:

  • Designer paper strip: cut at 20mm x 140mm
  • Luster Paper: Boho Blue, cut at 70mm x 140mm
  • Basic White: cut at 70mm x 140mm

Faux Centre Step

Night of Navy A4 cardstock, score in half at 105mm. Score on the short side all the way down the cardstock. On the long side, cut into three equal panels – cut at 99mm & 198mm. This will give you 3 panels to make cards with.

Decorate the Faux step, you will need:

  • Designer paper: cut at 100mm x 95mm
  • Silver Adhesive Backed Glimmer paper to die cut stars
  • Basic White cardstock scrap for the sentiment

To make this card, you may find my video tutorial helpful:

Thanks so much for joining me to make this card, I hope it has inspired your crafting.

Until next time… Stamp Creatively,

Click to shop supplies used in this project:

Stampin’ Staples – Click to shop these commonly used crafting supplies:

Stampin' Seal
$14.00
Paper Trimmer
$46.00
Bone Folder
$12.25
Paper Snips
$19.25
Clear Block B
$12.25
Clear Block D
$16.75
Clear Block E
$23.00
Clear Block H
$16.75

Colour INKspiration – 155

colink-blogbanner-v3

Up next for Colour INKspiration, #CI155, is almost a monotone colour palette, featuring three purple shades. I loved it as soon as I saw and this idea for my card sprung to mind straight away.

Here is our palette and inspo pic…

Fresh Freesia, Highland Heather, Gorgeous Grape and Cherry Cobbler. Plus of course we can add Basic White, Black, Crumb cake and metallics as well.

Here is the card I created….

Rose Packer, Creative Roses, Joyous Noel, Colour Inkspiration

Starting with a card base of Fresh Freesia cardstock, I use Highland Heather and Gorgeous Grape ink and applied them with a blending brush to create an ombre effect from the outside to the centre.

The main image is stamped from the Joyous Noel stamp set and die cut with the coordinating die set. Here I have embossed it with silver embossing powder. I then die cut fir leaves in Highland Heather and Gorgeous Grape cardstock to fan around the embossed die cut. Looping some silver thread beneath before adhering with dimensionals to the card base.

Rose Packer, Creative Roses, Joyous Noel, Colour Inkspiration

I heat embossed the same of the holly and berries onto Cherry Cobbler cardstock, again with sliver embossing powder. I fussy cut the berries and added them to my Freesia card. I also embossed a small sentiment while I had the Cherry cardstock out.

I finished off the card with a simple bow in more of the Silver thread. I hope this inspires some ideas for you.

ColINK-badge-v3

More INKspiration is loaded up over in our Facebook Challenge group. Head over and enjoyed all the amazing inspiration from the crew. We will be excited to have you play along with us. This challenge is open until 7pm Monday 20th November. Look forward to seeing you over on the group..

Until next time… Stamp Creatively,
RosePacker-SignOff

Click to shop supplies specific to this project:

Heat Tool
$54.00
Versamark Pad
$16.75

Stampin’ Staples – Click to shop these commonly used crafting supplies:

Stampin' Seal
$14.00
Paper Trimmer
$46.00
Bone Folder
$12.25
Paper Snips
$19.25
Clear Block B
$12.25
Clear Block D
$16.75
Clear Block E
$23.00
Clear Block H
$16.75

You Can Create It – October ideas

I’m back after a little hiatus… just incase you didn’t know, one of my kids broke both bones in their lower leg and required 3 surgeries and a skin graft to get him on the road to recovery. Many of the doctors and nurses who have helped us along the way, have been extremely surprised to learn it was a simple lunchtime soccer game at school that cause this much injury.

Needless to say I was extremely happy to find a small amount of time this week, to contribute some ideas for the October pack in Kit 3 of You Can Create It Kits.

The October pack focused on the Joy of Christmas Designer paper and colours. Plus of course we have the extra materials pack which we share across all packs in the kit. Here take a look:

With so much to play with, I created two cards – simple but fun to create.

Rose Packer, Stampin' Up!, You Can Create it, Joy of Christmas

This first one features a traditional patterned designer paper, which I coupled with the Olive cardstock. I die fir leaves from the Olive cardstock before adhering the designer paper over the top. It’s a great way to use up cardstock, as you wont see the shapes beneath. The Pinecones are die cut from Pecan Pie cardstock and I layered another strip of Pecan Pie cardstock to anchor my elements.

Rose Packer, Stampin' Up!, You Can Create it, Joy of Christmas

The second card, I used the Green checked designer paper and couple that with the Real Red cardstock. I cut a panel from the red cardstock and adhered some Adhesive Foam Sheets to the back, before layering with the designer paper on to the cardbase. I die cut the Noel from the red cardstock and painted them with Wink of Stella – you can just see it here, although it’s hard to capture the sparkle.

Rose Packer, Stampin' Up!, You Can Create it, Joy of Christmas

The large stamped image is from the Joy of Noel bundle, which I die cut with the coordinating die. I coloured these with Stampin’ Blends and flooded my berries with Wink of Stella – oops! I really was just happy to get some crafting time in. Keeping it simple and fun is my cuppa tea right now.

Here are the ideas from our Global Demonstrators for this months kit:

Aude Barbara

Anja Luft

Mikaela Titheridge

Until next time… Stamp Creatively,

Click to shop supplies used in this project:

Stampin’ Staples – Click to shop these commonly used crafting supplies:

Stampin' Seal
$14.00
Paper Trimmer
$46.00
Bone Folder
$12.25
Paper Snips
$19.25
Clear Block B
$12.25
Clear Block D
$16.75
Clear Block E
$23.00
Clear Block H
$16.75

Colour INKspiration – CI153

colink-blogbanner-v3

I did it!! I’m so excited!! I used Colour INKspiration’s #CI153 next colour challenge and created a Non-Traditional coloured Christmas card! This is huge for me as I am so very traditional when it comes to Christmas…

The colour palette for this challenge is just gorgeous, let’s take a look…

Colour Inkspiration challenge

Lemon Lolly, Petal Pink, Moody Mauve, Coastal Cabana and Lost Lagoon. Lots of colours in this challenge and they are so beautiful together.

Here is my Christmas card…

Rose Packer, Creative Roses, Stampin' Up!, Merriest Trees

Using the Merriest Trees, I started by creating a tree with Coastal Cabana and Lost Lagoon cardstock. I love the way the dies work in this bundle… there are several to choose from and you can either layer them to create a multi-tone tree like I have here or you can make different sized ones.

Next, I set about using the remaining colours in the palette – Base at the bottom and Star at the stop are in Lemon Lolly, baubles are in Petal Pink and presents are in Mauve and Pink. 

Rose Packer, Creative Roses, Stampin' Up!, Merriest Trees

Aaannnd because it’s October, my birthday month, I’m blinging up my projects. So here I have added extra Iridescent rhinestones. I may make another one and use some gold glimmer paper for the base and star… now that would be lots of bling! 

I’m really please at how this turned about and I know exactly who I will send this too as well!

ColINK-badge-v3

More INKspiration is loaded up over in our Facebook Challenge group. Head over and enjoyed all the amazing inspiration from the crew. We will be excited to have you play along with us. This challenge is open until 7pm, Monday October 25th. Look forward to seeing you over on the group.

Until next time… Stamp Creatively,
RosePacker-SignOff

Click to shop supplies specific to this project:

Stampin’ Staples – Click to shop these commonly used crafting supplies:

Stampin' Seal
$14.00
Paper Trimmer
$46.00
Bone Folder
$12.25
Paper Snips
$19.25
Clear Block B
$12.25
Clear Block D
$16.75
Clear Block E
$23.00
Clear Block H
$16.75

You Can Create It – September ideas

This months’ challenge pack features the All About Autumn suite of products. Whilst this pack is such a gorgeous one, it is a little weird for me being in Australia and in spring time – LOL!

Seriously, the Designer paper is just gorgeous and features lovely colours to create with, lets take a look:

These was so much to create with in this pack and in the extra materials pack, I created two cards. One showcasing the lovely photography that heavily featured in the All About Autumn Designer Paper Pack, one a little more fun and bright using the reverse side featuring that lovely Copper Foiling.

Rose Packer, Creative Roses, Stampin' Up!, Medley Mix, All About Autumn

This first one uses the photo image side of the designer paper.

Rose Packer, Creative Roses, Stampin' Up!, All About Autumn

The main section of the photo I wanted to use what right in the middle of the sheet, so I measured up and cut out the piece I needed. Not wanting to waste the rest of the strips, I used them by piecing them together to create a frame around the photo. 

I finished the card by die cutting a leaf image and creating some strips from the Oxidised Copper specialty paper also in the pack. This created a frame for the sentiment.

Rose Packer, Creative Roses, Stampin' Up!, Medley Mix, All About Autumn

Card number two is more bright and a bit more fun, as I used the side with the beautiful and sparkly copper foil. Creating a simple fun fold, by trimming down the card front, I layered designer paper with the Moody Mauve cardstock, to create a bright front. I stamped out the front onto the piece of card front I trimmed off, using the Medley Mix stamp set. I really like this set, as it coordinates with the Duo Punch Pack in the Annual Catalogue. 

Rose Packer, Creative Roses, Stampin' Up!, Medley Mix, All About Autumn

Here are the ideas from our Global Demonstrators for this months kit:

Aude Barbara

Karina Chin

If you live in Australia and would like more information about these kits and how you can subscribe – Visit ONLINE kits and classes tab.

Until next time… Stamp Creatively,

Click to shop supplies used in this project:

Stampin’ Staples – Click to shop these commonly used crafting supplies:

Stampin' Seal
$14.00
Paper Trimmer
$46.00
Bone Folder
$12.25
Paper Snips
$19.25
Clear Block B
$12.25
Clear Block D
$16.75
Clear Block E
$23.00
Clear Block H
$16.75

Colour INKspiration – CI152

colink-blogbanner-v3

Are you a blue person? I like blue tones, but I must admit I am fussy with them. This next challenge for Colour INKspiration, #CI152, features a couple of blues I usually use sparingly. Let’s take a look…

Night of Navy and Starry Sky are coupled with Gray Granite which is on the warm side. As with all our challenges, we can also use Basic White, Vanila and Black as  well as Metallics.

Here is what I made using this palette…

Rose Packer, Creative Roses, Stampin' Up!, Stars of Night bundle

These two blues just scream night sky don’t they? So yes, I went for the new Stars at Night Bundle. Those large stars just remind me of the Christmas Star so I had to go a card for the season. I also used silver products this time.

First, I embossed my card front with the Stars at Night Hybrid Embossing Folder. It has the word Hybrid is in the title as it is designed to have the dies used with it at the same time – so you cut and emboss at the same time. However, today I used them separately.

Then, I used the large group of three star die – the ones that actually fit in the folder – and die cut some stars from the Silver Glimmer paper from the Adhesive-Backed Glimmer paper pack in the Online Exclusives section of the website. I know… you heard right…. Adhesive…. Backed…..! I’m so stoked to have this paper onboard, it a great way to make stickers with your die cuts and that exactly what I did this time.

I used some of the other star dies to help layer my feature star element, in Gray Granite cardstock. And some others in Starry Sky cardstock. I almost always figure out my placement of elements before adhering, this also allows me to work out which to adhesive to use as well.

Rose Packer, Creative Roses, Stampin' Up!, Stars of Night bundle

Once they were adhered in place, I set about creating the finishing elements…. I heat embossed the sentiment in silver embossing powder and used some Silver twine beneath it. This sentiment actually comes from a different stamp set, as I wanted a horizontal shaped one to fit. Next I used some Enamel Effects in Silver two ways: first I mixed a little with some water, with my water painter and splattered and flicked droplets all over my cardfront. Lastly, I squeezed bubble drops to the centre to some of the stars for accents.

ColINK-badge-v3

More INKspiration is loaded up over in our Facebook Challenge group. Head over and enjoyed all the amazing inspiration from the crew. We will be excited to have you play along with us. This challenge is open until Monday, October 10th. Look forward to seeing you over on the group..

Until next time… Stamp Creatively,
RosePacker-SignOff

Click to shop supplies specific to this project:

Versamark Pad
$16.75
Heat Tool
$54.00

Stampin’ Staples – Click to shop these commonly used crafting supplies:

Stampin' Seal
$14.00
Paper Trimmer
$46.00
Bone Folder
$12.25
Paper Snips
$19.25
Clear Block B
$12.25
Clear Block D
$16.75
Clear Block E
$23.00
Clear Block H
$16.75

Colour INKspiration – CI151

colink-blogbanner-v3

I’m back creating for the Colour INKspiration crew with their next colour challenge for #CI151. A wonderful inspirational image inspired this palette and I decided today was the day to crack open my Darling Details bundle. But first let’s take a look at the challenge colours…

Petal Pink, Balmy Blue, Boho Blue and Pecan Pie. We can of course, add Basic White, Vanilla and Black as well as Metallics to round out the colours to create with.

As mentioned earlier, I opened my Darling Details bundles for this creation and can I say… I don’t know why I waited so long to purchase this bundle!

Rose Packer, Creative Roses, Stampin' Up!, Darling Details

As I was creating this card, I found myself wondering which colour, I was going to use for what elements. Which then made me wonder, if our challenge creators had a similar thought. So today, I wanted to share how I approach my colour to element choices.

First, I pull out pieces cardstock in each of the challenge colours. Holding up the pieces of cardstock, I look at my stamp set and slowly read through their names until one speaks to the colours I’m holding. In this case, it was the Darling Details bundle, but it’s funny, as I felt like a beachy-seaside creation would suit this palette. But flowers it was. I also grab out any matching dies/punches the stamps may have.

Next, looking through each of the stamps, I allocate stamps/dies to colours – flowers to Petal Pink, dies to Balmy Blue cardstock, sentiment stamp to Boho Blue ink. So that left me with how to fit in Pecan Pie – when the light bulb went off – Designer Paper and I just knew the Gingham pack would match nicely.

Now it’s all about creating…. I created a cardbase from Basic White thick cardstock. I stamped the outline of the flower in full strength Petal Pink ink and the colouring stamp, I used the generational stamping technique. I die cut those out. I also die cut the Balmy Blue flowery-leafy stems, I went with two to begin with. I die cut my frame from Basic white cardstock. Then I started to play around with laying out the elements.

Rose Packer, Creative Roses, Stampin' Up!, Darling Details

Cutting down the Designer Paper to fit the card front helped with deciding there was waaay to much Pecan Pie gingham and I needed to reduce that. So instead of die cutting a shape to sit over the top, I decided to die cut the Designer paper to create a second frame. To make sure these two frames were going to match, I adhere the white frame to the designer paper and then used the Deckled Rectangle die to cut out the middle – now I can use this for another project. 

I adhered the frames to the card base and began layering my flower elements until I was happy with the arrangement. But…. before I adhering all the elements as final…. I always ask myself “is there anything else I can add?” I decided a couple of tiny flowers in Boho blue ink might be just enough. I  wanted to tuck them under my petal pink flowers though, so they weren’t fully visible. I stamped these directly onto the cardbase along with the sentiment. Then adhere two flowers to the base. Using glue dots, I adhered the two die cut flowery-leafy elements together and then onto my card and used dimensionals for the last flower for the top.

Rose Packer, Creative Roses, Stampin' Up!, Darling Details

As I was proudly holding us my creation for inspection…. I thought a few gems in Boho Blue would just work nicely.

ColINK-badge-v3

More INKspiration is loaded up over in our Facebook Challenge group. Head over and enjoyed all the amazing inspiration from the crew. We will be excited to have you play along with us. This challenge is open until Monday September 25th. Look forward to seeing you over on the group..

Until next time… Stamp Creatively,
RosePacker-SignOff

Click to shop supplies specific to this project:

Stampin’ Staples – Click to shop these commonly used crafting supplies:

Stampin' Seal
$14.00
Paper Trimmer
$46.00
Bone Folder
$12.25
Paper Snips
$19.25
Clear Block B
$12.25
Clear Block D
$16.75
Clear Block E
$23.00
Clear Block H
$16.75